Ultima360
User guide
×
Menu
Index

19.3.1. Create New VP

 
In this section instructions will be given on how to create a new VP from the VP preference windows.
1.      Open the VP preference.
2.      A new window will appear, click on the ‘Create New’ button located in the bottom right corner of the window.


The new VP window will appear as shown below:
19.3.1. Create New VP
1

Name VP

1. Name VP
Enter a name for the viewing protocol (option: enter a description).
2

Select Prior(s)

2. Select Prior(s)
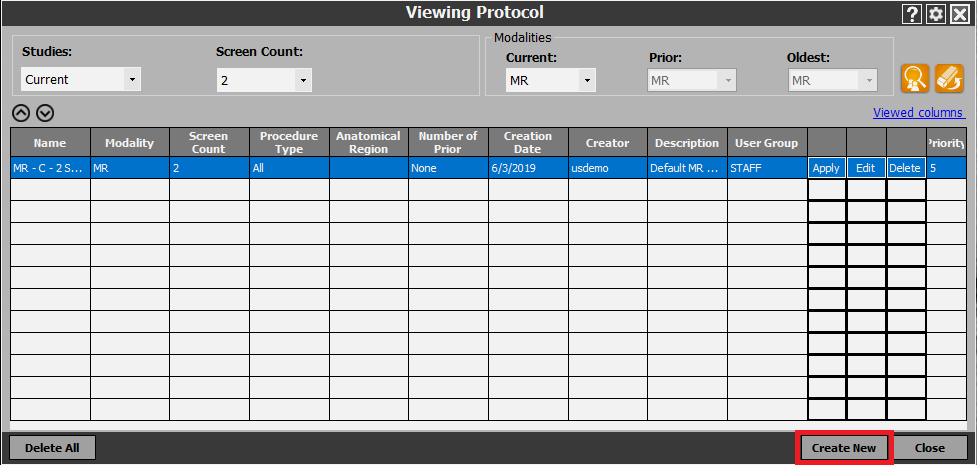
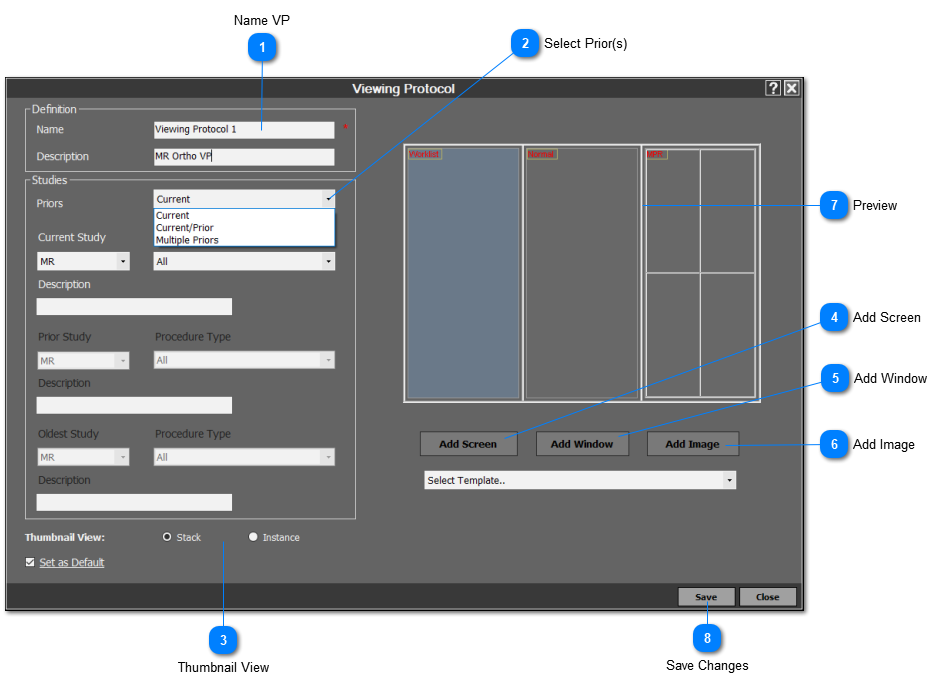
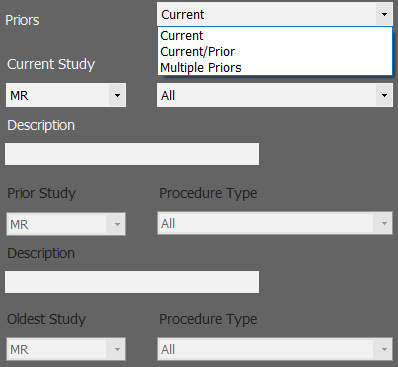
Use the drop-down menu to select the type of VP to make according to prior studies (only current, current and most recent prior, or current with multiple priors).
3

Thumbnail View

3. Thumbnail View
Select how you would like to see your series on the series panel.
  • Stack: images within a series are stacked into a single file.
  • Instance: images within a series are distributed into its own file.
4

Add Screen

4. Add Screen
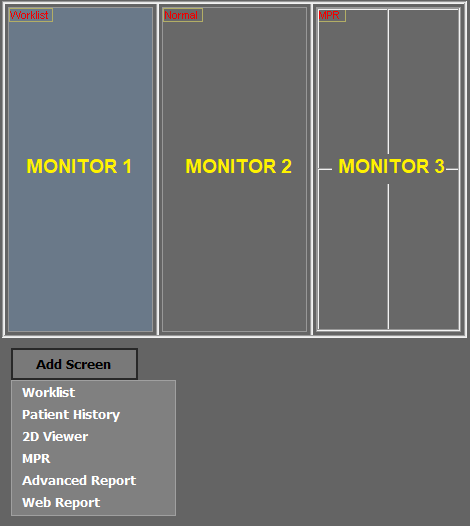
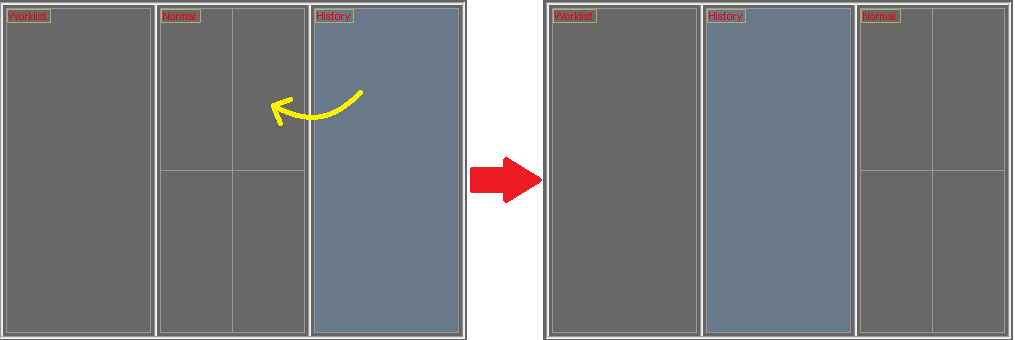
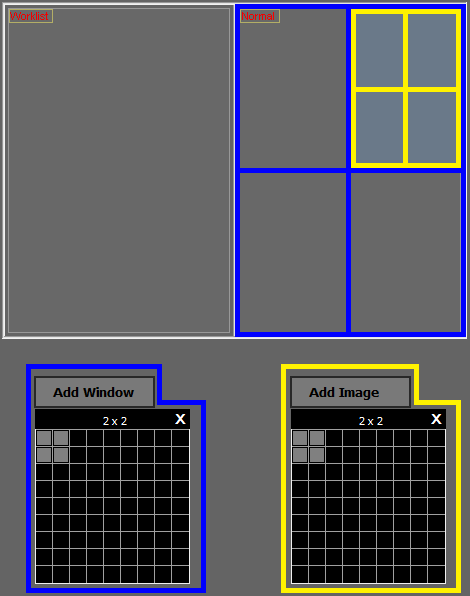
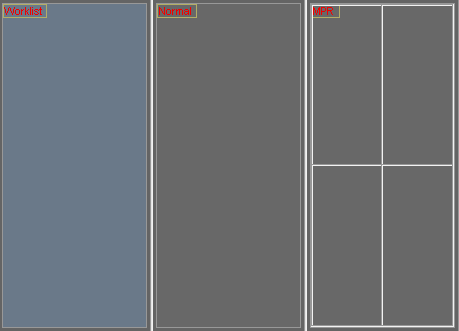
Use the drop-down menu to select and assign the different screens showing the worklist, patient history, 2D viewer, MPR viewer, advanced reporting tool, or web reporting tool to the monitors.
Drag the screens with your mouse to change the order and positions of the monitor setup.
   
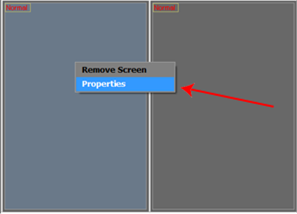
  • To delete a screen, right click on the screen and click on ‘Remove screen’:
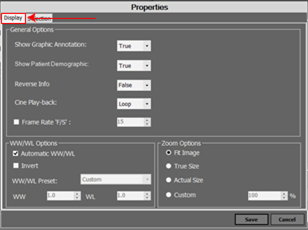
  • To access the advanced settings for the 2D viewer, right-click on the screen labeled 'Normal' and click on 'Properties. The Properties menu has two tabs  (Display and Selection) where the user can customize the VP further according to body part, beam projection, image laterality, WW/WL settings, zoom settings, etc. These settings are modality specific and therefore differ according to the modality of the VP being created.  The user can make any changes to these settings and then click on ‘Save’ located in the bottom right corner of the window in order to save the changes.
       
 
5

Add Window

5. Add Window
Click on 'Add Window', highlight the desired format, and click on it to confirm the layout. Each window will contain a single series within a study.
6

Add Image

6. Add Image
Click on 'Add Image', highlight the desired format, and click on it to confirm the layout. Each window will contain a single image within a series.
7

Preview

7. Preview
The user can preview the viewing protocol.
8

Save Changes

8. Save Changes
Click on 'Save' when you are done to save the viewing protocol.
 
 
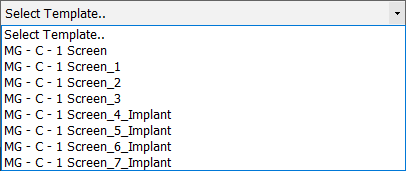
Select Template: Use the drop-down menu to load any predefined templates that are modality specific. The user can select one of the predefined templates to view it, or use it to create a new VP.