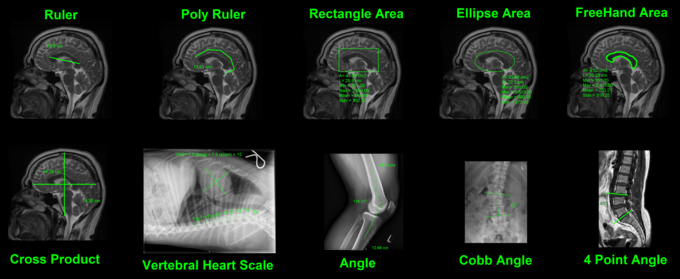
Measurements are used to measure specific areas or angles on an image.
1. Click on the measurements icon from the toolbox panel, in the bottom left corner of the screen: 
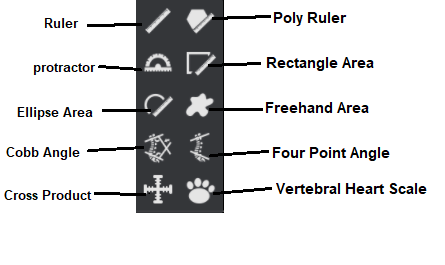
2. A pop-up window will appear with a few different measurement options to choose from, a basic description of each one is given below:
|
Ruler
|
Click & drag the mouse to draw a line.
|
|
Polyruler
|
Click & drag mouse to draw the first line, and then click every time the for a new line, right click to end the line.
|
|
Protractor
|
Click & drag mouse to draw the first line, then click to produce the second line for the angle
|
|
Rectangle Area
|
Click & drag the mouse from the corner of the rectangle to draw a rectangle
|
|
Ellipse Area
|
Click & drag the mouse to draw an ellipse.
|
|
Freehand Area
|
Hold in mouse click and draw freehand region of interest
|
|
Cobb Angle
|
Click & drag mouse to create line parallel to superior end of vertebrae, and then repeat for inferior end of vertebra.
|
|
4 Point Angle
|
Click & drag mouse to create the first line, then let go of mouse click and repeat to create second line. The angle between the lines will show.
|
|
Cross Product
|
Hold in mouse click on start of cross product, drag the mouse to expand
|
|
Vertebral Heart Scale
|
Click & drag the mouse to cover the area of the heart. Indicators for T4-T12 will appear; drag them to the correct position.
|
3. Select one of the options and then draw the measurement on an image from the image window.
Examples of the different measurements available: